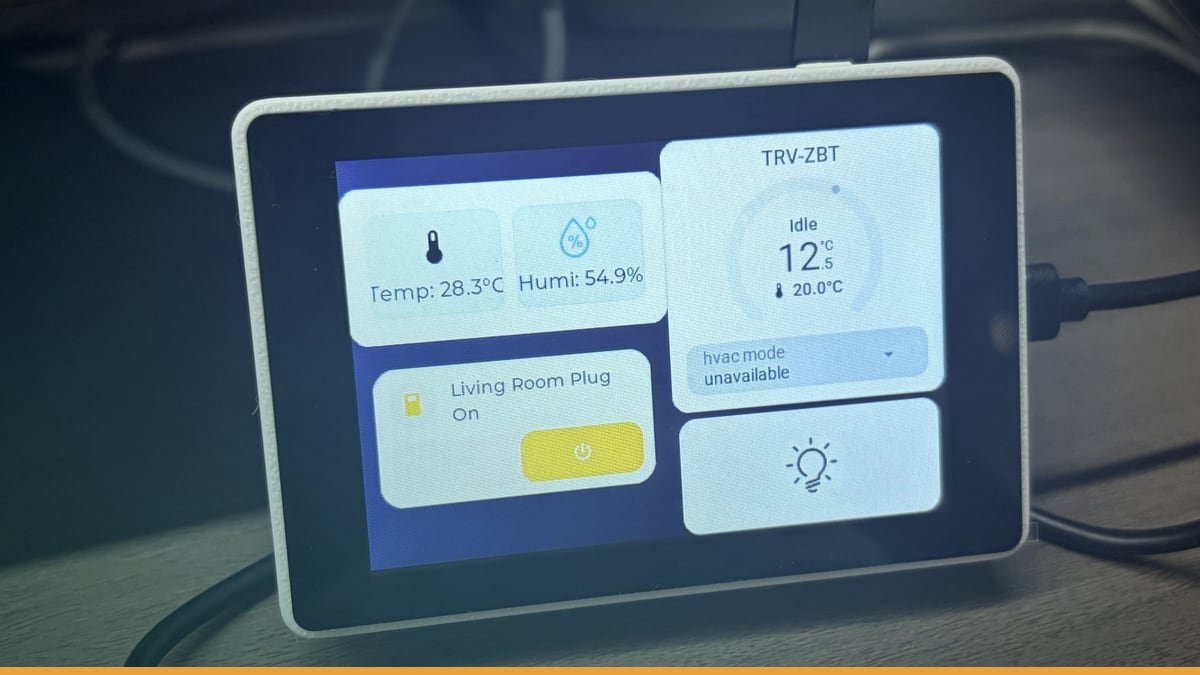
Header image source: I wanted a small Home Assistant touchscreen, so I tried this ESP32-S3 screen – Share your Projects! – Home Assistant Community via Home Assistant Community via Google — cropped to 16:9 and colour-adjusted.
Key takeaways
- $15–$40 hardware boots straight into Home Assistant dashboard
- No Android OS, no battery degradation, no lag
- DIY firmware works on Cheap Yellow Display and Guition ESP32-S3-4848S040
The Cheap Yellow Display and Guition ESP32-S3-4848S040 just landed firmware that boots straight into Home Assistant. No Android. No battery. No lag. Just a screen that wakes up inside your dashboard for $15–$40.
This isn’t another hack using old tablets. It’s purpose-built hardware running purpose-built code. And it’s forcing smart home users to question why they were paying so much for similar functionality.
The Two Paths We’ve Been Stuck On—And Why Both Suck
Right now the smart-home wall-panel game has exactly two options: repurposed Android slabs and off-the-shelf touchscreen bricks. Neither is good.
The Tablet Trap
The Lenovo Tab M10 is the community’s go-to. At its price point, multiple units become expensive. And that tablet is still running a full-fat Android OS under the Home Assistant Companion kiosk. That means:
- Lag. Background processes slowly turn your silky-smooth dashboard into a slideshow.
- Updates. A single Android security patch can break kiosk mode, leaving you with a lock screen instead of your lights.
- Battery rot. Even when plugged in 24/7, lithium-ion degrades. Over time, tablet batteries degrade and may need replacement.
Worse, tablets weren’t designed for walls. They come with chunky cases, awkward viewing angles, and a form factor that screams “tech demo” instead of seamless integration.
The Commercial Panel Fantasy
Panels like the YC-SM08P (~$100) and YC-1011 (~$300+) solve the form-factor problem. They’re sleek, flush-mountable, and built for 24/7 duty. But:
- Fixed specs. You get whatever screen brightness, resolution, and touch tech the manufacturer chose. Want a brighter panel? Too bad.
- Locked layouts. Proprietary firmware means rigid menus. Swipe gestures? Custom icons? Forget it.
- Upgrade roulette. If the vendor stops pushing updates, your $300 panel becomes a paperweight.
And then there’s the WAF problem—the Wife Acceptance Factor. If nobody’s tapping the screen, it doesn’t matter how pretty it is.
The DIY Escape Hatch: How This Firmware Works
The new solution sidesteps both traps by running on dirt-cheap hardware: either the Cheap Yellow Display (ILI9341 + XPT2046 resistive touch) or the Guition ESP32-S3-4848S040 (ST7701S RGB + GT911 capacitive touch). Here’s the playbook:
Hardware
- Cheap Yellow Display: 2.8"–3.5", 320×240, resistive touch. Price: ~$15–$25.
- Guition ESP32-S3-4848S040: 4", 480×480, capacitive touch. Price: ~$30–$40. Powered by an ESP32-S3 with Wi-Fi and BLE.
Firmware Loading
No coding. Download a pre-built binary, flash it via USB with esptool (ESP32) or Arduino IDE (Cheap Yellow Display). Five minutes later, the device boots straight into your Home Assistant dashboard.
Why It Beats Tablets
- No OS tax. The firmware is optimised for Home Assistant. No Android, no background tasks, no lag.
- Lower power. Both devices sip 5V/1A, making them perfect for PoE or wall adapters.
- Dedicated hardware. No battery rot, no accidental app launches, no update surprises.
Hardware Face-Off: Cheap Yellow Display vs. Guition ESP32-S3-4848S040
Not all DIY screens are equal. Here’s the breakdown:
Cheap Yellow Display
- Screen: ILI9341, 320×240, resistive touch (XPT2046).
- Pros:
- Dirt cheap. ~$15–$25 lets you deploy one in every room without guilt.
- Dead simple. Power and USB are all you need.
- Tiny. Fits standard 3D-printed cases, ideal for flush mounting.
- Cons:
- Postage-stamp resolution. 320×240 feels cramped for anything beyond basic buttons.
- Resistive touch. Less responsive, requires more pressure.
- Screen real estate. Hard to fit more than 4–6 buttons per page.
Guition ESP32-S3-4848S040
- Screen: ST7701S, 480×480, capacitive touch (GT911).
- Pros:
- Sharper. 480×480 is usable for text and icons.
- Capacitive touch. Smoother, more responsive taps.
- ESP32-S3. Wi-Fi and BLE let it run standalone for simple tasks.
- Cons:
- Pricier. ~$30–$40, though still a fraction of a tablet.
- Soldering. Some setups need manual power and touch wiring.
The Wildcard: The 4" Guition Alternative
A smaller, cheaper Guition device (~$20) exists, but it needs manual coding to work with Home Assistant. The ESP32-S3-4848S040, by contrast, works out of the box with the new firmware.
What You Can Actually Control
This isn’t a full Home Assistant dashboard. You won’t be streaming camera feeds or monitoring complex data on a small screen. But for quick, room-specific controls, it’s surprisingly capable.
Capabilities
- Touch buttons for any Home Assistant entity—lights, switches, climate, media players.
- Multi-page layouts with swipe gestures between screens.
- Custom icons (though resolution limits creativity).
- Flush mounting (the Cheap Yellow Display’s size makes this easy).
Ideal Use Cases
- Single-room dashboards. Bedside control for lights, AC, and blinds. Kitchen control for appliances and timers.
- **Multi-device setups. One screen per floor, avoiding the single-device bottleneck.
- **Hidden panels. Flush-mounted in walls or cabinets.
Limitations
- No complex automations. Forget scenes with multiple conditions.
- **No camera feeds. The hardware has limitations for complex tasks.
- No voice control. If your household lives by “Hey Google,” these panels won’t replace it.
Setup: How Hard Is It Really?
The process is simpler than you’d think—but it’s not entirely plug-and-play.
Firmware Flashing
- Tools: USB cable, esptool (ESP32) or Arduino IDE (Cheap Yellow Display).
- Steps:
- Download the pre-built firmware binary for your device.
- Connect via USB.
- Run a single command (e.g.,
esptool.py --chip esp32s3 --port /dev/ttyUSB0 write_flash 0x0 firmware.bin). - Wait for the flashing process to complete.
No coding. No compiling. Just one command.
Home Assistant Integration
Once flashed, the device appears as a native entity in Home Assistant. Configure it via the UI—no YAML, no extra hubs. The firmware handles the rest, talking to Home Assistant over Wi-Fi.
Power and Mounting
- Power: Both devices run on USB power. Options:
- Wall adapters.
- PoE splitters (for cable-free setups).
- USB ports on smart switches or hubs.
- Mounting:
- Cheap Yellow Display: Can be mounted in various enclosures.
- Guition ESP32-S3-4848S040: Can be mounted for installation.
Cost Breakdown: DIY vs. Commercial vs. Repurposed
|————————-|—————|————–|—————|——————–|
The Takeaway
- Cheap Yellow Display: The budget king. At $15–$25, you can carpet every room without blinking.
- Guition ESP32-S3-4848S040: The sweet spot. $30–$40 buys a sharper screen, capacitive touch, and Wi-Fi/BLE.
- Tablets: More expensive than DIY options.
- Commercial panels: Overpriced for what they deliver. The YC-1011 is powerful but costs as much as a used laptop.
The Catch: Why This Isn’t for Everyone
This solution is a game-changer—but it’s not a universal fix. Here’s what might trip you up:
Screen Size Limits
If you’re used to larger tablets displaying complex information, these screens will feel limited. They’re single-purpose tools, not dashboard replacements.
Touch Responsiveness
- Cheap Yellow Display: Resistive touch feels primitive. It works, but it’s not as smooth as a tablet or the Guition’s capacitive screen.
- Guition ESP32-S3-4848S040: Capacitive touch is better, but it’s still not as responsive as a modern smartphone.
WAF (Wife Acceptance Factor)
If your household ignores touch panels in favour of voice commands or physical switches, these devices won’t change that. They’re supplementary, not primary interfaces.
DIY Stigma
Flashing firmware, wiring power, and debugging Wi-Fi aren’t for everyone. If you break into a cold sweat at the sight of a soldering iron, this might not be your scene—though the process is simpler than most smart-home projects.
Future-Proofing: Where Does This Go Next?
The firmware is open-source, so the community could take it in some interesting directions:
Firmware Updates
- MQTT support: Let the panels run standalone without Home Assistant, turning them into local control hubs.
- LVGL integration: Add richer UI elements like sliders, graphs, and animations.
- BLE/Wi-Fi direct control: Let the panels talk directly to smart devices (switches, sensors) without Home Assistant in the loop.
Hardware Trends
The ESP32-S3’s dual-core processor and Wi-Fi/BLE open up possibilities: Say voice commands to the panel itself, no cloud required.
- Offline operation: Store basic automations locally, so the panel keeps working even if Home Assistant crashes.
- Multi-protocol support: Add Zigbee or Z-Wave radios for direct device pairing.
Competition
Who Should Try This—and Who Should Walk Away
Try This If…
- You want sub-$50 control panels for specific rooms (bedroom, kitchen, garage).
- You hate OS bloat and battery rot—dedicated hardware wins every time.
- You’re comfortable with DIY (flashing firmware, basic wiring).
- You need multiple panels and want to avoid high costs.
Stick to Tablets/Commercial Panels If…
- You need large screens for complex dashboards.
- Your household won’t touch panels (voice assistants rule).
- You lack time for setup and want plug-and-play.
- You need advanced features on your control panels.
The Big Question: Will This Kill the Tablet Market?
Unlikely—at least not yet. Tablets still have a place for users who want comprehensive dashboards. But for room-specific controls, this DIY approach is a no-brainer.
The real disruption here isn’t the hardware. It’s the mindset shift. We’ve been trained to think smart-home control panels need to be expensive, power-hungry, or repurposed from other devices. This firmware proves that’s nonsense.
The question now: **** If the DIY community keeps pushing, we might see more affordable ready-made panels. And that’s when the real fun begins.
Sources
- A Cheap and Easy Control Screen for Home Assistant
- I revived a cheap Android tablet by turning it into a Home Assistant control panel
- Seeking Hardware Recommendations for Wall Mounted …
- Small Touchscreen for each room- fresh install – Hardware
- What is the Best Ready-Made Wall Touch Screen for Home …